
How To Cut A Fade Hairstyle
Let’s get real for a sec fades look awesome, but cutting one? It can feel like defusing a bomb with a butter knife the first time around.But don’t worry, I’ve been there hands trembling, clippers buzzing, praying to the barber gods I wouldn’t leave someone (or myself) looking like a patchy potato. If you’re itching to learn how to cut a fade hairstyle, grab your clippers and a little patience, and let’s break this down together like old friends.
What’s a Fade Hairstyle Anyway?

Alright, before we go hacking away at hair, let’s quickly talk about what a fade actually is. Basically, it’s a smooth transition from short hair (usually near the neck or sides) to longer hair as you move up the head. This style is one of the many versatile hairstyles for men that’s perfect for adding clean structure and edge to any look.
There are different types of fades, and here are the ones you’ll hear most:
- Low Fade: Starts just above the ears.
- Mid Fade: Begins around the temple area.
- High Fade: Kicks in near the top of the head.
- Skin Fade (aka Bald Fade): Fades right down to the skin. Super clean and sharp.
Tools You’ll Need (AKA Your Fade Arsenal)
Listen, I love improvising as much as the next guy, but cutting a fade with kitchen scissors is a hard no. Whether you’re trying this at home or leveling up your barber skills, the right tools matter especially when exploring different short hairstyles for men.
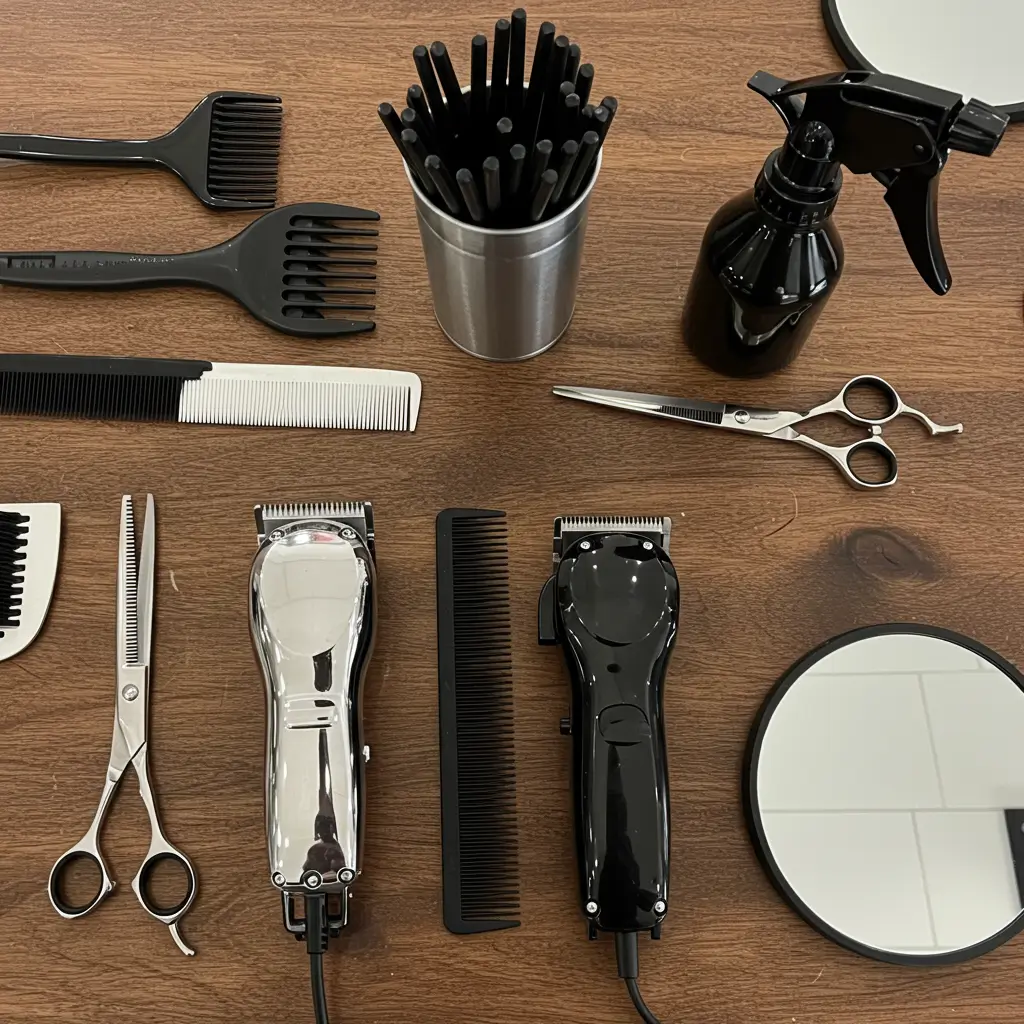
Here’s your non-negotiable fade toolkit:
- Clippers with guards (1 to 4 at least)
- Edgers or trimmers for tight detailing
- Scissors (just in case you want to blend the top)
- Comb for guiding and lifting hair
- Mirror setup if you’re DIY-ing your own fade (yes, it’s possible, but slightly terrifying)
- Spray bottle for dampening the hair
Pro Tip: Always start with clean, dry or slightly damp hair. Greasy hair makes the fade look choppy, and not in a trendy way.
Step-By-Step: How To Cut A Fade Hairstyle
Now for the good stuff. Follow this blueprint and you’re golden (or at least not bald in weird places).
Step 1: Decide on the Fade Type
Low, mid, or high? Don’t just wing it trust me. Figure out where you want the fade to start. Low fades are more subtle, while high fades scream, “I’ve got style and I know it.” You can get inspired by scrolling through other trending short hairstyles for men with beards to help match your vibe.
Step 2: Start With the Longest Guard
Slap on your longest clipper guard (usually a #4) and start cutting the top section downward. This sets the base length for blending.
Keep your strokes consistent and follow the shape of the head. Don’t zigzag around like a lawnmower on Red Bull.
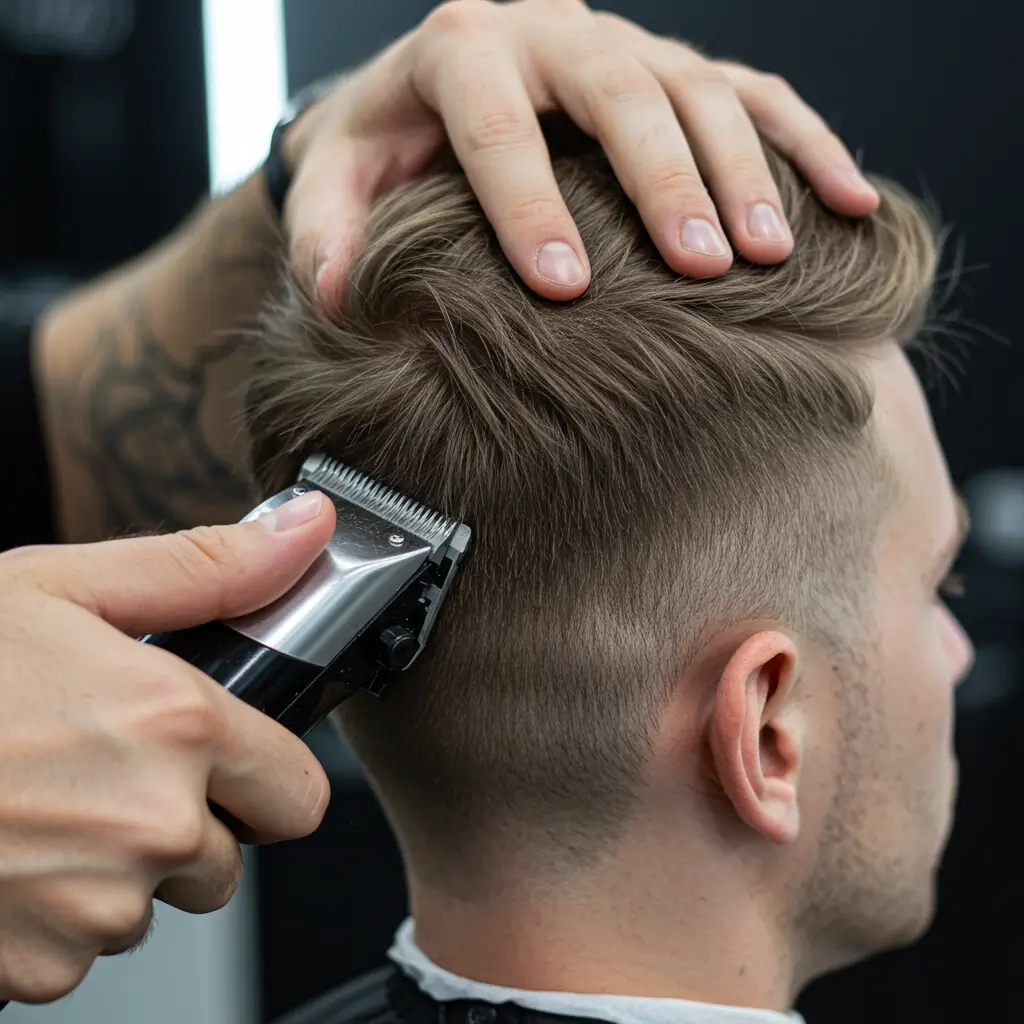
Step 3: Create the Fade Line
Here’s where the magic begins. Pick the spot where you want the fade to start and run the clippers with a shorter guard (maybe a #1 or #2) around that line.
You’re essentially “drawing” a line all the way around the sides and back of the head.
FYI: Don’t panic if it looks weird at this stage it’s supposed to. It’ll all come together in a sec.
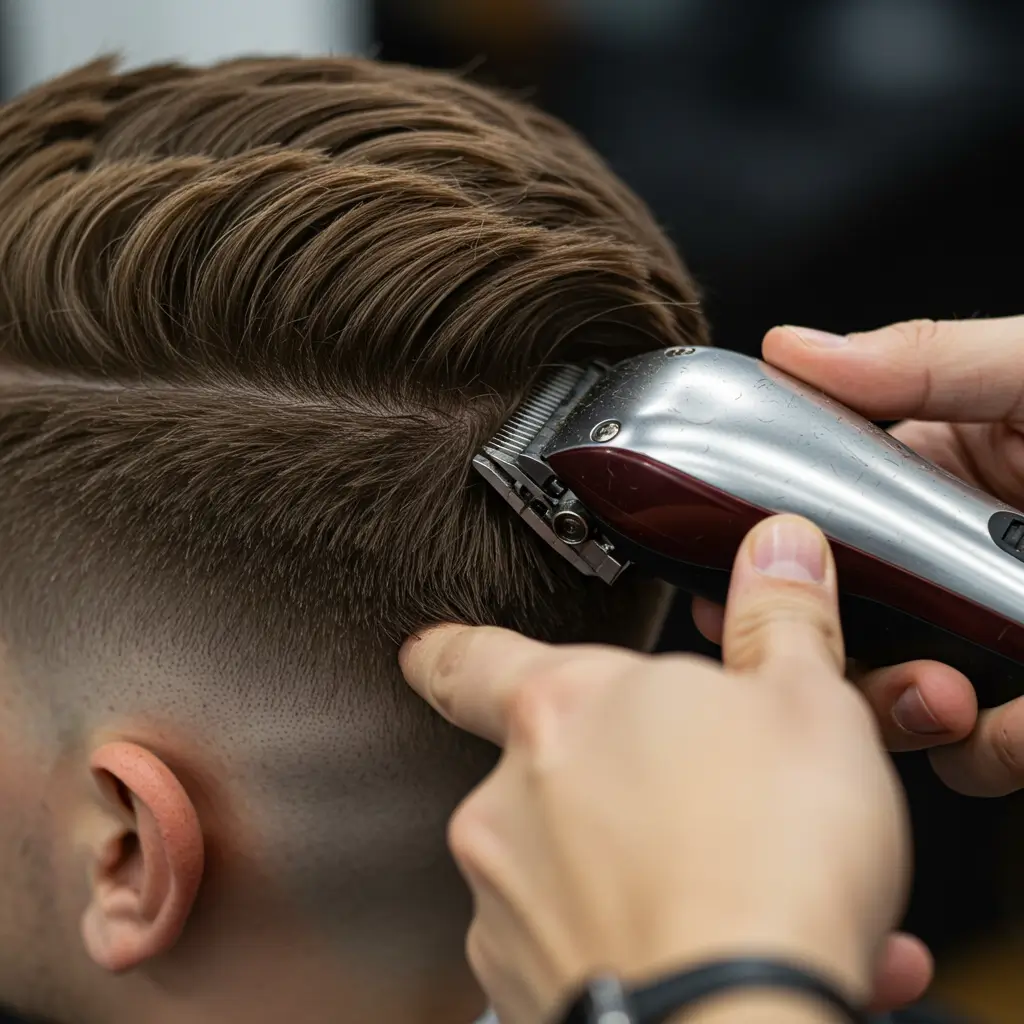
Step 4: Blend Like a Boss

Swap out your clipper guard for the one in between the top and bottom lengths (say, a #3 if you used #4 and #2).
Then, start blending. Use short, flicking motions—almost like you’re scooping hair off the head.
Still patchy? Use a clipper-over-comb technique to finesse any uneven spots. Basically, you run the clippers over a comb instead of directly on the scalp for a smoother blend.
Step 5: Clean Up the Edges
This is what separates the pros from the “my cousin tried to cut my hair once” crowd.
Use your trimmers or edgers to shape around the neckline, ears, and sideburns. You want crisp lines, not fuzzy outlines. Don’t forget to check behind the ears it’s a classic rookie blind spot.
Tips to Avoid a Hair Horror Story
Because, let’s be honest, we’ve all had at least one tragic haircut we don’t talk about.
- Don’t rush. Fades are like artwork except you can’t just paint over a bad fade.
- Always blend upward. It’s easier to erase mistakes that way.
- Use mirrors for DIY fades. Front + handheld mirror = full view of the crime scene.
- Trim little by little. You can always take more off, but you can’t glue hair back on.
Common Fade Mistakes (And How to Dodge Them)

Cutting Too High Too Soon
Don’t start high unless you really want a high fade. Once you go up, there’s no coming down.
Using One Guard Only
That’s not a fade that’s a buzz cut with dreams. Use multiple guards to actually get the gradient look. For extra inspo, check out our full guide to hairstyles that break down layering and blending techniques like a pro.
Not Checking for Symmetry
One side looking tighter than the other? Step back, look in the mirror, and make sure both sides are even before finishing.
Practice Makes Perfect (And Maybe a Few Ugly Fades)
Look, you’re not gonna nail it first try. And that’s okay! We all start somewhere. My first DIY fade? Let’s just say I wore beanies for a week straight. But now? I can fade my nephew’s hair while talking trash about his video game skills.
Keep practicing, watch tutorials, and don’t be afraid to mess up a little. Hair grows back and confidence builds with each cut.
Final Thoughts: So, You Gonna Try It or Nah?

Cutting a fade hairstyle might sound intimidating, but once you break it down, it’s just a process of layering, blending, and cleaning up. Whether you’re doing it on yourself, your buddy, or testing your skills on your little brother (with permission, please), you’ve got this.
Remember: Be patient. Take your time. Don’t freak out if it looks rough halfway through. That’s normal. Now go grab those clippers and show that head of hair who’s boss.