
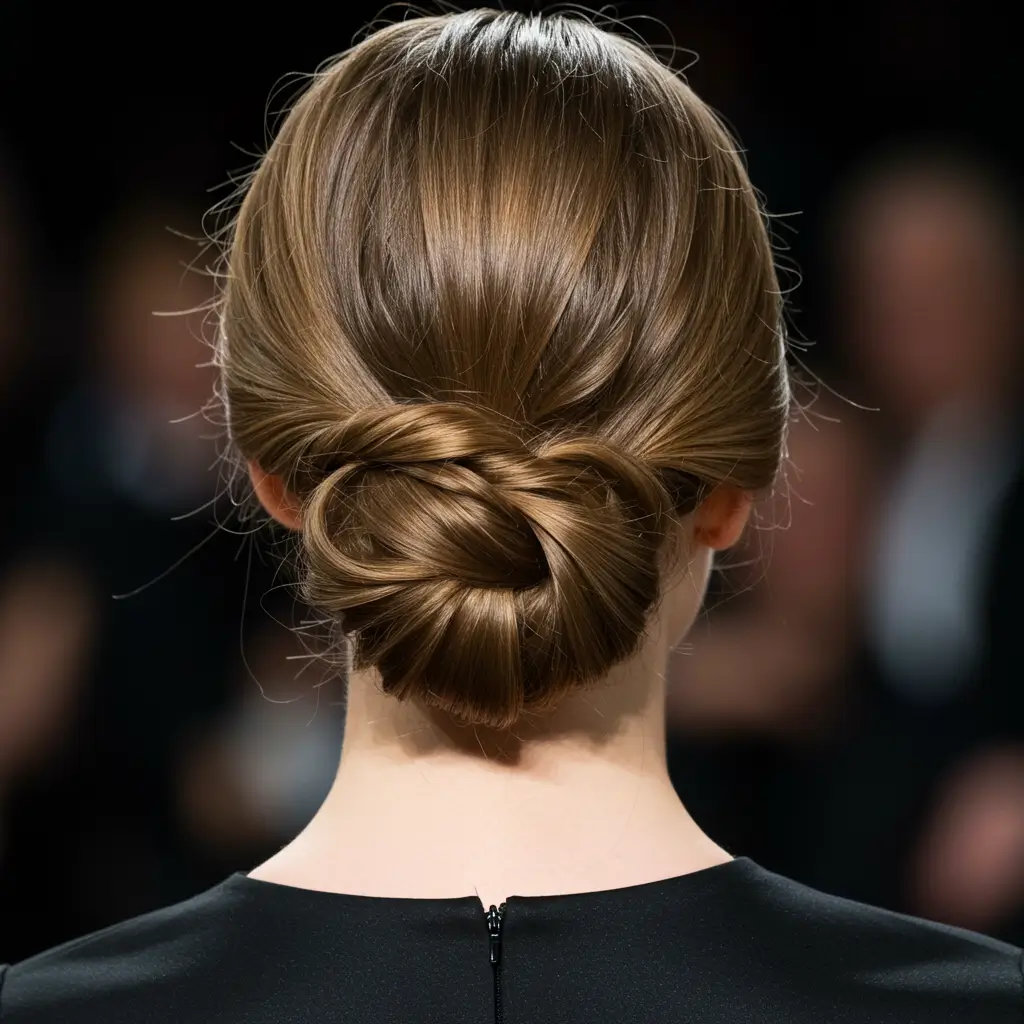
How To Do A French Twist Hairstyle ?
Ever stared at those polished red carpet looks and thought, “How the heck do they get their hair to do THAT?” Yep, same. The French twist is one of those hairstyles that looks super elegant but also kinda intimidating. But here’s the truth: it’s not as scary as it looks. In fact, once you get the hang of it, you’ll start doing it just because you can.
I’ve personally used the French twist for everything from weddings to “I overslept but still want to look like I have my life together” kind of days. So if you’re ready to stop doom-scrolling tutorials and actually master this classic hairstyle, let’s get into it—no gatekeeping, promise.
What Is a French Twist (And Why Should You Care)?
Let’s keep it real there are tons of updos out there. So why bother with the French twist?
Because it’s chic, timeless, and surprisingly versatile. It works for weddings, interviews, date nights, and those “I want to look fancy but I’m also lazy” days. Plus, it’s a lifesaver when your hair is one dry shampoo day past acceptable.
And here’s the kicker: you don’t need a stylist or a glam squad. Just some bobby pins, a comb, and a little patience.
What You’ll Need (A.K.A. Your Hair’s New BFFs)
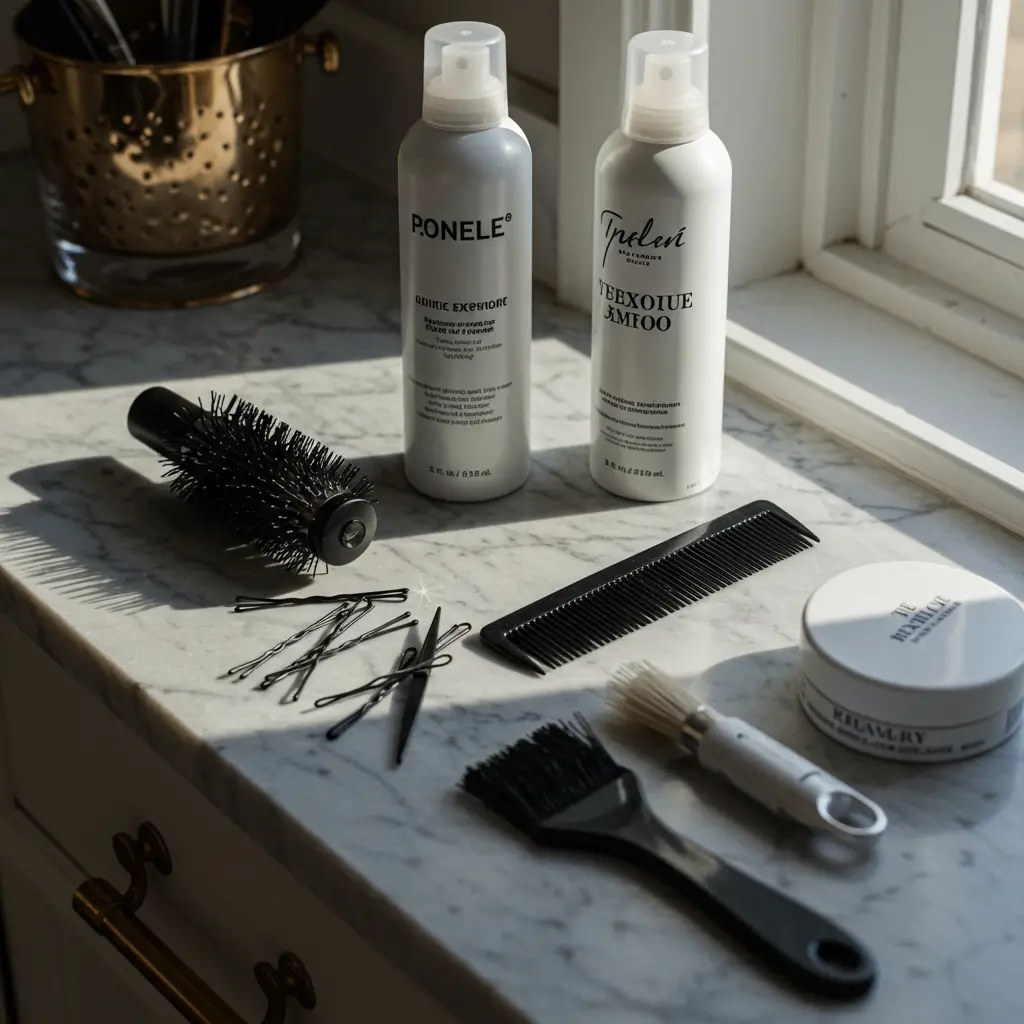
Before you dive in (ugh, I mean… start), make sure you’ve got your supplies ready:
- Bobby pins (lots of ‘em—like, more than you think)
- A teasing comb or fine-tooth comb
- Hair spray (hello, hold!)
- A hair elastic (optional, but helpful)
- Hair texture spray or dry shampoo (for grip—slippery hair is the enemy)
Pro tip: If your hair is squeaky clean, add a little texture spray. FYI, the French twist works way better with second-day hair.
Step-by-Step: How To Do a French Twist Hairstyle Like a Pro

Step 1: Prep Like a Boss
Give your hair a little volume by teasing the crown. You don’t need to go full 80s, just enough to avoid looking like your hair’s been flattened by life.
Spritz in some texture spray to keep things from slipping. If your hair’s super silky, this step is a game-changer.
Step 2: Gather and Sweep
Now, gather your hair at the nape of your neck like you’re about to do a low ponytail—but don’t secure it with an elastic (unless your hair’s thick and needs the extra help).
Then, sweep all your hair to one side. Doesn’t matter which one—just pick your best selfie side
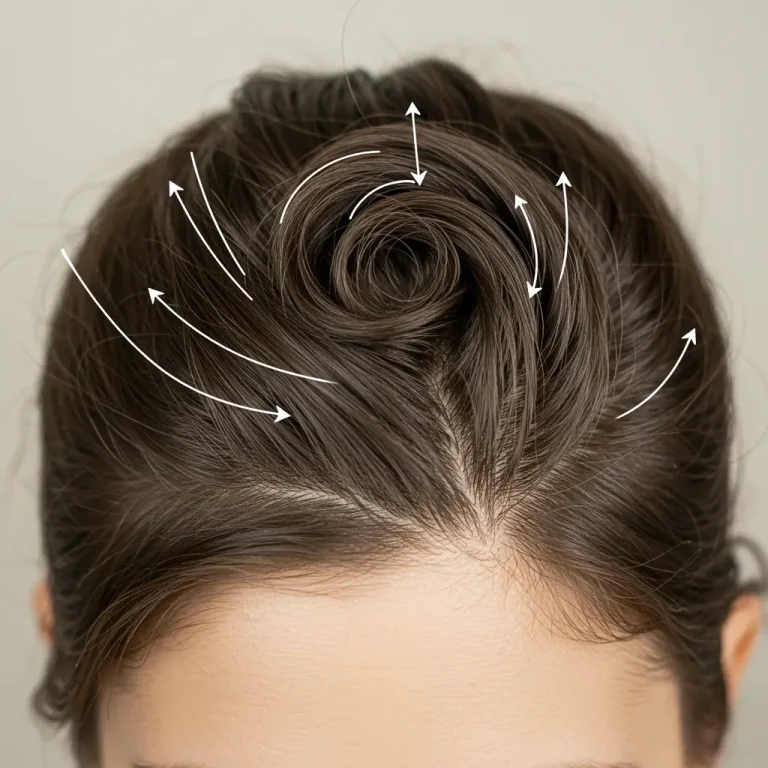
Step 3: Twist It Real Good
Here’s the magic: start twisting the hair upward and inward. As you twist, tuck the ends into the roll you’re forming. It should start to resemble that classic French twist shape—sleek on the outside, party in the pins.
Step 4: Pin Like You Mean It
This is where the bobby pins come in hot. Secure the twist vertically, starting from the bottom and working your way up. Crisscross the pins to lock it in place. IMO, this is the trickiest part, but it gets easier, promise.
If you’ve got flyaways, now’s your time to shine—aka smooth them down with a comb and mist of hairspray.
Step 5: Lock It and Rock It
Finish off with a generous mist of hairspray. You want that twist to survive wind, dance floors, or whatever chaos the day throws at you.
Optional: Pull out a few soft pieces around your face for a more relaxed, romantic look. Or don’t. Totally your call.
Common Mistakes (And How To Dodge Them Like a Hair Ninja)
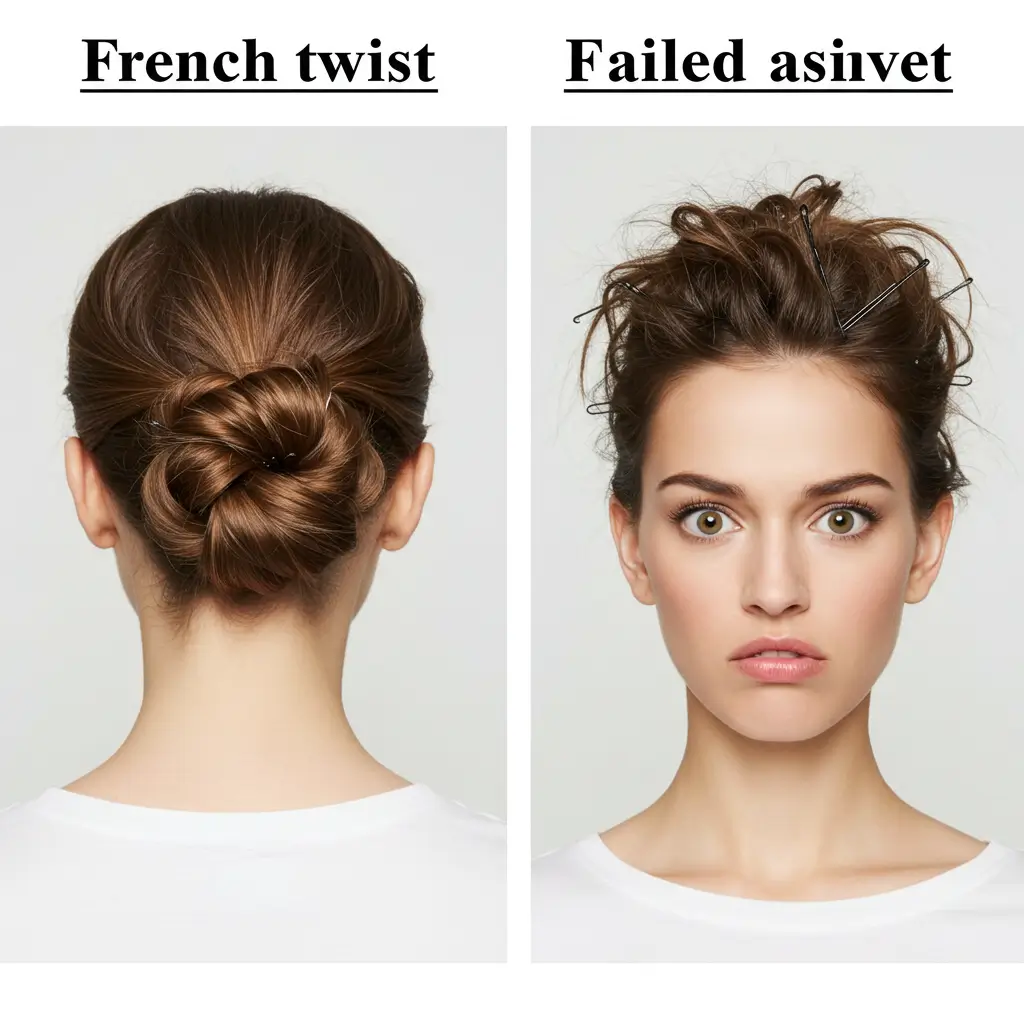
Not Enough Pins
If your twist is flopping around like a sad noodle, you probably didn’t use enough pins. Don’t be shy—more is more here.
Starting With Slippery Hair
If your hair is too clean or silky, it won’t hold. Add texture spray or backcomb a bit more.
Ignoring Your Hair Type
Thick hair? Use an elastic to hold it in a low ponytail before twisting. Fine hair? Tease the heck out of it before even thinking about twisting.
French Twist Variations That Totally Slay
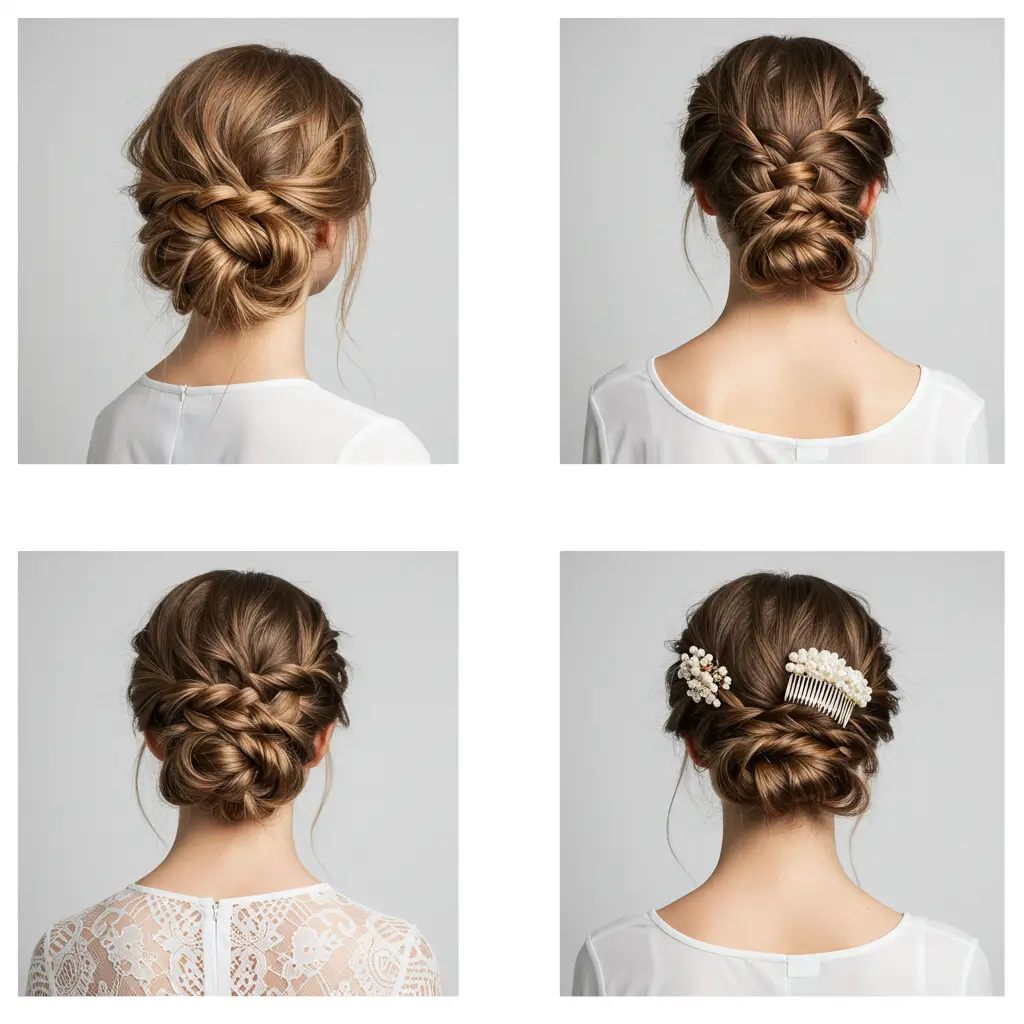
Not into the classic tight twist? No problem. There are so many ways to remix it:
Messy French Twist: Looser, with face-framing pieces. Perfect for boho brides or casual brunch.
Braided French Twist: Add a braid along one side before you twist for extra flair. It’s an elegant touch for wedding hairstyles for curly hair, especially if you want more texture.
Low Side Twist: Keep it lower and to one side for a soft, asymmetrical vibe. Bonus: looks amazing with a strapless dress.
Accessorized Twist: Throw in a hair comb, pearl pin, or some floral clips for bonus points. Great for formal events or as part of your bridal updo look.
Real Talk: Is the French Twist Worth the Effort?
Let me be brutally honest: the first time I tried a French twist, it looked like a bird made a nest on my head. But I stuck with it. Why? Because when it works, it looks expensive AF, even if you’re just wearing sweatpants.
And unlike those 12-step hair tutorials that require heat tools, curling irons, and a prayer circle, this one only takes a few minutes once you’ve nailed the motion.
So yes, it’s absolutely worth the effort. Especially when people ask if you went to a salon and you get to say, “Nope, just me and a handful of bobby pins.”
Final Thoughts: You Got This

If you’ve made it this far, congrats you now know how to do a French twist hairstyle without losing your sanity. It might take a few tries, but hey, what doesn’t?
Next time you need a go-to updo that screams effortless elegance, whip out your pins and twist like a boss.
Got any go-to tricks or accessory hacks for your French twist? Share the love, because honestly, we could all use one less hair meltdown. Now go forth and twist it like you mean it.